Creating and modifying a template
Before we get started you need to remember these simple facts:
- A template contains the labels you see on the item screen.
- You select a template that you want to use for a collectible.
- You then name and save that new template you created.
- The new template appears in your folder screen.
- You then open the new folder you just created, edit the item screen labels to fit
your collecting style or collectible with specific information on that collectible.
- Save the customized item labels in the folder as a new template.
- The result is a new template that you can share with other collectors that has custom labels for the
items that make up that specific collectible.
The following instructions will step you through creating your own templates or modifying one of
ours to perfectly fit your needs. After the first time you create a template for a folder you will
realize how EZ it is to customize KollectAll for your collecting needs.
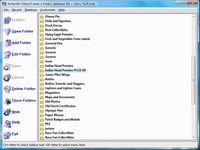
1. Create a Folder for anything you collect by clicking on the "Add Folder" button on the left hand
side of the folder screen, which then opens a pop up window with a list of default templates that
are included in KollectAll for you to select from.

2. Select a template from the list by highlighting the template you want and clicking on the "OK" button.

3. The Add folder window pop's up with the default template name you just selected. Here you can change
the name to a custom name for that type of collectible. For example, if you collect Coins, and this folder
is for a specific type of coin, maybe PCGS certified Indian Head Pennies, then you would name the folder
"Indian Head Pennies PCGS 60" instead of just Coins. This way you can create specific templates for all
the different types of collectibles you have and have a specifically named folder with a custom template
for each collectible type, instead of the "one size fits all" template that other program offer.
In the screen shot below you can see that the generic template "Coins" has been renamed "Indian Head
Pennies PCGS 60" clicking on the "OK" button saves it as a new folder. But, the original "Coins" template
remains, what you are basically doing is creating a new template that you will customize and use for this collectible.
If you make a mistake and change the original template you can come back to our web site and import it back
into the program and start again so don't worry if you make a mistake.

4. The new folder you just created now appears in the Folders screen, it has the same collecting
template data as the "Coins" folder that you selected as the default template. In the next few steps
we will use the Customizer to modify the default template to exactly what you want!

5. Next you may want to edit the folder you just created, this way you can include specific
information that may be needed to describe the collectible. With the Item screen open click on the
"Customizer" option tool at the top of the screen. Then click on the drop down option called
"Create Custom Labels".

6. When you click on the create custom labels the item screen turns on the editor (notice how the labels
for each field has moved into the input space?) at this point you can
change the default item screen labels to fit your collectible, collecting style or language.

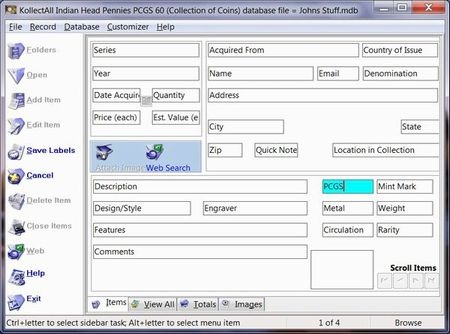
7. Customize the Item screen labels by changing the labels right on the item screen that has opened,
to anything you want. Yes, you can change the wording to German, Italian, Spanish, etc.
To change a label simply highlight the label and type over it or erase it and type your new label
into the box, see the highlighted blue box in the illustration the field Grade was changed to PCGS.
Once you are finished click on the "Save" button on the left side of KollectAll.
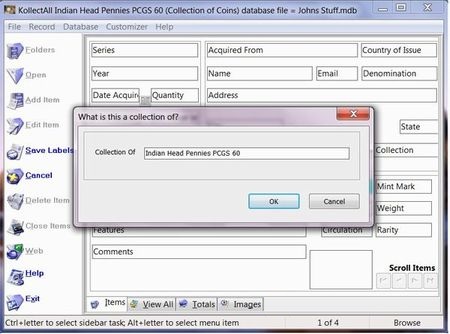
8. The "What is this a collection of?" window pop's up, here you enter the a new name that will
represent this collection/collectible and the program will use this to also create a new template
with the name you are giving these changes.
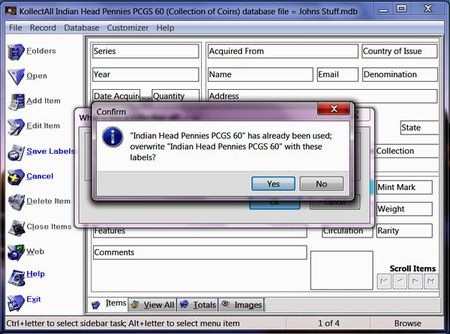
 9. Since you are changing the labels of a template you created for the collectible, and now you are
modifying the labels for that template, you can either create a new template at this time, even more
customized for your collectible or save the changes to the template that you created in step 1 through 4.
KollectAll will ask you if you are sure that you want to overwrite the template you originally created. This step basically
lets you build specialized templates for a collectible, in this case you could make multiple templates for the
Indian Head pennies PCGS 60, Indian Head pennies PCGS 65, Indian Head pennies PCGS 70, etc. easily instead of
having to go through multiple steps.
 10. Once you have saved the change, your template will be updated with the change labels.
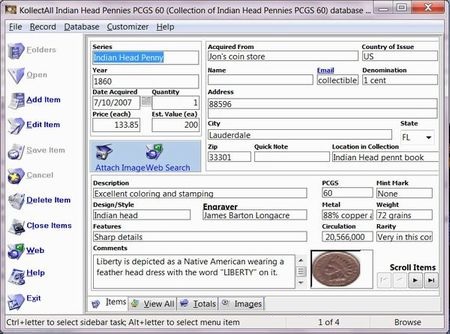 One last thing, remember each time you modify a template and save it with a different name
you create a new reusable template that will appear in alphabetical order
in the template pop up window so you can also reuse your custom templates and
modify them for another collectible or you can create new ones for something new that you collect!
Options under the "File" tool.
- New Database
- Open Database
- Close Database
- Save Database as
- Address Book
- Import Custom Folder/Labels Template
- Export Custom Folder/Labels Template
- Delete Custom Folder/Labels from the Database
- Print Setup
- Print
- Backup
- Restore Backup
- Export
- Exit
Options under the "Record" tool.
- First
- Next
- Previous
- Last
- Insert
- Add Image
- Remove Image
- Launch Microsoft Paint
- Copy
- Paste
Options under the "Database" tool.
- Sort Up
- Sort Down
- Advanced Sort
- Filter
- Undo Sort
- Remove Filter
- Find
- Setup Columns on View All Page
- Reports
- Show Database Location and File Name
Options under the Customizer tool.
- Change Program Name
- Change Program Image
- Restore Defaults
- Change Labels
- Create Custom Labels
Options under the Web tools.
- OnLine Storage
- Web Hosting
- Website Templates
Options under the "Help" tool.
- Table of Contents
- Index
- Web Help
- About
|
|
Click here to take a tour of KollectAll

Take a tour
Click below for more details:

Main Splash Screen

Folder Screen
Item Screen
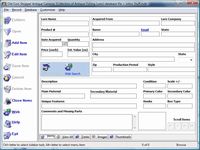
Image Viewer screen
View All screen
Totals screen
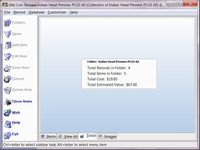
Reports

|